Roles
An actor is an entity performing an action in the app. It could be an org member, a customer, a system user, or a service account. Roles provide the ability to control what access an actor has on the app, portal, and PLuG. Org admins can control what actors can see or interact with on the app using roles. Roles are assigned to groups. Users in the organization get access to the app by being members of various groups.
A role consists of the following:
- Targets
- Privileges
- Caveats
Targets
A target represents the object type on which the role is applied. Every role comes with a single target. List of currently available targets:
- Issues
- Tickets
- Conversations
- Opportunities
- Account
- WorkSpaces
- Contacts
- Dashboard
For example, in a content management system (CMS), different user roles may be assigned specific access to various targets, such as tickets. The access control system can have roles like Customers, Admin and, Support each with distinct permissions related to the tickets target. Support may have the ability to create, edit, and delete pages, customers could be limited to creating and editing their tickets, while admins would have full control over all pages, including the ability to delete them.
Privileges
Privileges represent the operations/actions that the role allows you to perform on the target object. A role can have more than one privilege. List of supported privileges:
- CREATE: to create the target object.
- READ: to read the target object.
- UPDATE: to update the target object.
- DELETE: to delete the target object.
Caveats
A caveat specifies conditions under which a role applies. Roles may or may not include caveats.
When defining roles, you can use targets and privileges to grant specific permissions. For instance, a role might have the privilege to "Allow READ on tickets". However, there could be cases where you need the role to be more specific, such as "Allow READ on tickets when the actor is the owner". This is where caveats become important. Roles with caveats only grant privileges when the specified conditions are met, allowing for fine-grained access control in the application.
Caveats can be applied to the attributes of the actor (the user) or the target (the resource being accessed). Each caveat consists of three elements: a key (attribute of the actor or target), an operator (for example, belongs to), and a value (for example, target.participants).
Create custom roles
You can create custom roles in your org if you are an admin of the group.
- Go to Settings > User Management > Groups.
- Select the group in which you want to create roles.
- Go to Privileges. You can see the categories Support, Build, Grow, Analytics.
- Select the desired category, open the drop-down menu, and select a target for which you want to create custom roles.
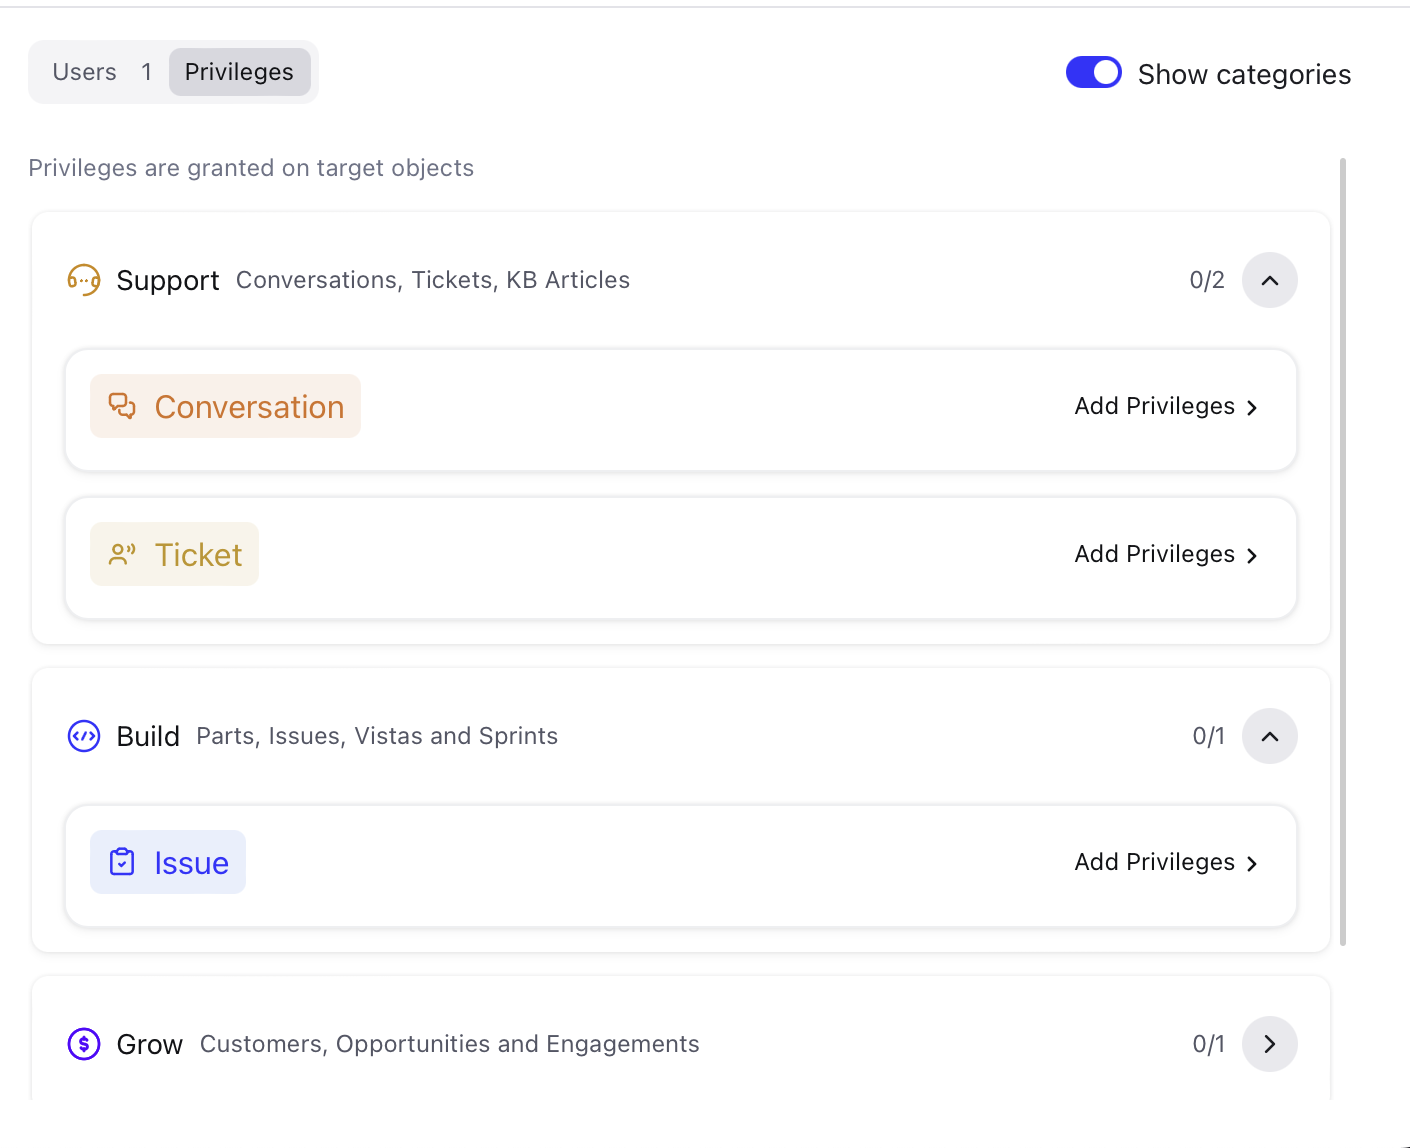
- Click Add privileges > Custom Roles tab.
- Click + New Role.
- Select the required privileges for the role.
- Click Create.
You can also add caveats to the role.
Add caveats to a role
-
Create a new custom role.
-
Click + Caveats to add a caveat for the role.
-
Specify the user field, operator, and part.
Available operators are equals to and belongs to.
Example: When the user belongs to owners.
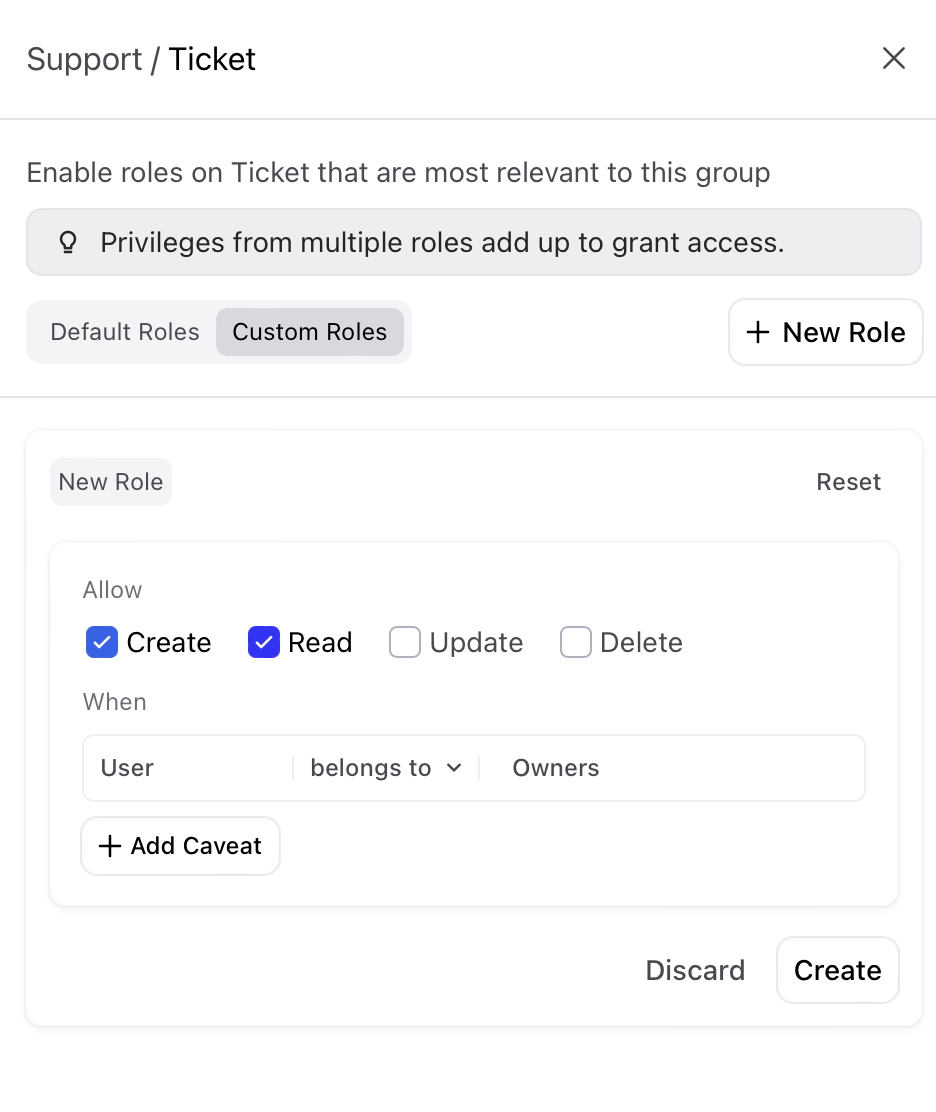
Here, Tickets is a target that consists of a role with privileges READ and CREATE. The conditions like "When User belongs to Owners" and, "When User workspace is equal to Ticket workspace" are caveats. Actors get access to perform actions only when those conditions are satisfied.
Caveats can be added to the following objects:
- Ticket
- Issue
- Account
- Opportunity
- Account
- WorkSpaces
- Contacts